Showing posts with label sewing disasters. Show all posts

August 12, 2013

A Waste of Time and Fabric

I finally made a dress I had on my list of future projects since quite a while. I had seen a version of this dress on the Burdastyle site which I loved, made by Burdastyle member Mishiko.

Endlich habe ich ein Kleid genäht, das schon länger auf meiner Liste gestanden hat. Ich habe auf der Burdastyle-Seite dieses Kleid von Mishiko gesehen und fand es sofort toll. 

photo by mishiko, member of Burdastyle.com

The pattern is from the famous Stylish Dress Book by Yoshiko Tsukiori. So I bought the book, and made the dress from the same pattern myself, but it doesn't look anything like the coveted dress.

Der Schnitt ist aus einem japanischen Schnittmusterbuch, dem berühmten Stylish Dress Book von Yoshiko Tsukiori. Ich habe also das Buch aufgetrieben und gekauft (in Französisch! in Englisch konnte ich es damals nicht finden), und habe jetzt endlich das Kleid selbst genäht, aber es sieht überhaupt nicht aus wie von mir erhofft, nicht ein kleines bisschen. 


Instead, I feel like being put into a toddler's dress. And although the dress is very wide, it's not even comfortable!

Ich komme mir vor, als würde ich im Kleid einer Dreijährigen stecken. Und obwohl das Kleid sehr weit geschnitten ist, ist es noch nicht mal bequem. 

It doesn't look better from the back, either.

Von hinten sieht es auch nicht besser aus. 


I made photos from the side view too, but I want to spare you and me posting these. Just believe me that I look like something between a tent and a pregnant sea cow.

Ich habe auch Fotos von der Seitenansicht gemacht, aber die zu posten, möchte ich Euch und mir lieber ersparen. Ich sehe aus wie eine schwangere Seekuh in einem Zelt. 

This dress is a total failure. Still, I tried to "save" it, ripped off the back and pinned it on my dress form, with the side seams taken in and less flare.

Somit ist das Kleid ein totaler Fehlschlag. Ich habe zwar noch probiert, es zu retten, habe das untere Rückenteil wieder abgetrennt und an meiner Puppe festgesteckt, mit Abnähern statt Raffung und mit den Seitennähten etwas reingenommen, damit es nicht so weit ist. 


But it still does not look like something I would like to wear. And I totally lost my motivation for any further work on this dress. The dress will go into the garbage.

Es sieht aber immer noch nicht nach etwas aus, das ich gerne tragen würde. Und ich habe für das Kleid total die Lust verloren. Ein Fall für den Mülleimer. 

I was thinking about what was the reason for the failure. I think that it's the pattern. I also have to admit that I had suspected something like that before (although I didn't expect it to be that bad). These japanese dresses look really cute made up in the pattern books, but they are all very loose fitting. Maybe the style looks better on very slim girls than on short and compact persons like me. I will get back to the good old Burdastyle patterns and vintage patterns now.

Ich muss zugeben, dass ich ja schon ein bisschen geahnt habe, dass mir das Ganze vielleicht nicht steht. Diese japanischen Kleider sehen im Buch alle sehr nett aus, aber sie sind alle ziemlich weit. Wahrscheinlich steht der Stil sehr schlanken Persönchen besser als einer kurzen und gedrungenen Figur wie mir. Und das allgemeine Styling spielt sicherlich auch eine Rolle. Allerdings hat das Ergebnis dann doch meine schlimmsten Befürchtungen übertroffen! Jedenfalls werde ich so bald keine japanischen Schnittmusterbücher mehr benutzen und lieber zu den guten alten Burda- und Vintage-Schnitten zurück kehren. 

One remaining problem: in my enthusiasm and while making this dress, I had found the second edition of the Stylish Dress Book and already bought it. And now, that I don't have any need for it, it only takes up space on my bookshelf, and what I'd most like is putting it into the garbage together with the dress.

Eine Sache ist aber noch ärgerlich: kurz bevor ich das Kleid gemacht habe, lag der zweite Band vom Stylish Dress Book in meiner Buchhandlung, und in meinem überstürzten Enthusiasmus habe ich es gleich gekauft. Jetzt würde ich es allerdings am liebsten gleich zusammen mit dem Kleid in die Tonne treten. 


So, if anyone of you wants to have it, you can get it. Just leave me a comment that you want it by 19th of august, midnight CET. I don't care to which country I have to send it, I'll be happy to give it to anyone who gets more use out of it than I do. In the unlikely case that more than one person wants to have it, I'll draw a name by lot. Thanks for helping me out!

Bevor es so weit ist, habe ich allerdings gedacht, falls jemand von Euch aus irgendwelchen Gründen diese Buch gerne hätte, kann er es geschenkt bekommen. Hinterlasst mir einfach hier bis nächsten Montag, den 19. August, einen entsprechenden Kommentar. Im unwahrscheinlichen Fall, dass es mehr als einen Anwärter geben sollte, würde ich auslosen. Ehrlich, Ihr würdet mir einen grossen Gefallen tun!


March 19, 2013

Fitting Mistakes

I have infected my friend N. with the sewing virus. About a year ago, she became interested in sewing and so I showed her the basics and told her all that I know. Now, she is starting to sew clothes on her own and when she needs help, she sends me a photo or we meet and I try my best to lead her through the process.
Her actual sewing project is Burdastyle's popular peplum top from the 8/2012 issue. And although we had made a muslin before, we had to face some serious fitting problems when the garment was almost finished.

Ich habe meine Freundin N. mit dem Nähvirus infiziert. Sie hat sich immer für meine Nähprojekte interessiert, und nachdem ich ihr vor etwa einem Jahr die Grundlagen beigebracht habe, näht sie selbst ihre eigenen Projekte. Wenn sie Hilfe braucht, schickt sie mir ein Foto oder wir treffen uns und ich bemühe mich, ihr weiter zu helfen. 
Ihr aktuelles Projekt ist das beliebte Schösschentop aus der Burdastyle 8/2012. Und obwohl wir vorher ein Probeteil gemacht hatten, sah das fast fertige Top gar nicht schön aus. 


As you can see on the (bad) photo (it was taken with an iPad), there was a lot of puckering at the armhole seam, and stress wrinkles which go from over the bust towards the armpits. The whole garment seams to be pulled to N.'s left side, which you can see at the neckline. (And the darts have not been properly pressed, but that is not a fitting issue.) So last week, we started to look for what was going wrong and how to save the top.

Wie man auf dem Bild sehen kann (trotz der schlechten Qualität, sie hat es schnell mit dem ipad aufgenommen), gibt es jede Menge kleiner Fältchen an der Armkugel, und Spannungsfalten über der Brust, die bis zu den Achseln verlaufen. Ausserdem scheint das ganze Top zu N.s linker Seite gezogen zu werden, was man am Halsausschnitt gut erkennen kann. (Die Abnäher sind auf dem Foto auch noch nicht richtig gebügelt, aber das war nicht das Hauptproblem.) Letzte Woche sind wir also der Sache nachgegangen. 


It turned out that something had gone wrong during finishing of the edges of the armhole seam allowances. After we removed the lining from the armholes and the finishing zigzag stitches, the sleeve puckers were almost completely gone. Maybe it has to do with the fabric which has some stretch in it? I don't know.

Erst einmal hat sich herausgestellt, dass wohl beim Versäubern des Armlochs irgend etwas schiefgegangen war. Denn schon als wir die Zickzack-Stiche aufgetrennt hatten, waren es schon etwas weniger Falten an der Armkugel. Vielleicht hatte das etwas mit dem Stoff zu tun, der Elasthan enthält. 

Next, the sleeves were taken out completely, followed by an endless basting the armhole seams, taking them out and rebasting them again, in order to eliminate the pulling to the left shoulder and the left puckers. At some point finally the shoulder seams sat right over the shoulder bones, and the puckering on the sleeve caps was gone. But the garment was still sitting too far left, looking at the neckline. Was it due to body asymmetry? What to do? And why didn't this problem appear in previous projects?

Danach haben wir die Ärmel komplett herausgetrennt und in mühevollem Rumprobieren eingeheftet, ausgetrennt, wieder eingeheftet... Irgendwann sassen dann die Ärmelnähte korrekt über den Schulterknochen, und die kleinen Fältchen in der Armkugel waren weg. Nur hatte es immer noch den Anschein, dass das ganze Kleidungsstück zur linken Seite gezogen würde. Wir dachten an eine Schulterasymmetrie, aber bisher war das Problem ja auch nicht aufgetreten...


After a lot of puzzling over it, I thought that maybe it wasn't a fitting problem at all. N. is still a beginner in sewing and maybe she hadn't sewn the neckline seam symmetrically? So we tried to correct this issue directly at the neckline seam and it seems to look better now. Whatever the problem really was.

Nach einigem Rumprobieren und Rätseln kam mir der Gedanke, dass das vielleicht gar kein Passformproblem war. N. ist noch Anfänger beim Nähen und hat möglicherweise den Halsausschnitt nicht gleichmässig symmetrisch genäht? Wir haben also direkt am Halsausschnitt an der Besatznaht weiterprobiert und es scheint jetzt tatsächlich besser zu sein als vorher (was auch immer das tatsächliche Problem sein mag). 


We didn't manage to eliminate the stress wrinkles on the front that are going under the arms. And I think I know why: the armhole is too small. In the muslin, the armhole was awfully gaping at the front, which I pinned out. Therefore, the armhole was smaller, and the sleeve cap would not fit into it, so I had to adjust for that, too. Since N. has thin arms, I made the sleeve cap smaller at the front. Now that I see those wrinkles I'm sure that the right way would have been to lower the armhole instead. I did that now in the almost finished garment as much as it was possible while still being able to set the sleeves in again, and the wrinkles are reduced, but not gone.

Die Falten über der Brust haben wir nicht ganz wegbekommen, und ich weiss auch, warum: das Armloch ist schlicht und einfach zu klein. Am Probeteil stand das Armloch vorne ziemlich weit ab, also habe ich einen Keil abgesteckt und den Papierschnitt entsprechend verändert. Damit war das Armloch kleiner und der Ärmle hätte nicht mehr ins Loch gepasst. Um dafür auszugleichen, habe ich auch die Armkugel vorne etwas verkleinert - N. hat ja eh so dünne Arme -, und das war der Fehler! Ich hätte wohl besser die Armlochtiefe angepasst. Ich habe jetzt im Nachhinein versucht, noch etwas Tiefe aus dem Armloch herauszuholen, aber es hat nicht ganz gelangt. Die Falten sind zwar weniger, aber nicht verschwunden. 

Sorry, N.! I'll think twice while fitting your muslin next time! After all, I think the top is now wearable at least, and we learnt something.
By the way, N. is thinking about shortening the sleeves to a 3/4-lenghth. What do you think? (Photo pre-fitting)

Liebe N., es tut mir leid, diesmal hat es nicht ganz geklappt. Beim nächsten Probeteil werde ich zweimal nachdenken. Ich denke aber, das Top ist jetzt zumindest tragbar und wir haben was gelernt. 
Übrigens überlegt N., ob sie die Ärmel nicht auf eine 3/4-Länge kürzen soll. Was meint Ihr? (Foto ist ein Vorher-Foto)


November 22, 2012

Little House on the Prairie

Some weeks ago, I found a cotton plaid shirt dress in a store which I liked, but the fit wasn't good. Luckily, I'm able to make one by myself!
Im Urlaub vor ein paar Wochen habe ich in einem Geschäft ein kariertes Blusenkleid aus Baumwolle anprobiert. Es sah gut aus, aber es hat leider nicht richtig gepasst. Glücklicherweise kann ich mir aber auch selber eins nähen!


However, when I bought the fabric, I was a bit worried that the finished dress might look too much like "The Little House on the Prairie", but during construction I found that the comparison wasn't too obvious. Until a friend came for a visit, saw the almost finished dress on my dressform and shouted out: "Oh, how nice, that looks like from the little house on the prairie!" And now, the dress has its name!
Beim Stoffeinkauf war ich etwas beunruhigt, ob das Kleid in dem Stoff nicht etwas zu sehr nach "Unsere kleine Farm" aussehen würde. Beim Zusammennähen fand ich aber, dass der Vergleich doch nicht zu auffällig wäre. Bis dann eine Freundin zu Besuch kam - sie sah das fast fertige Kleid auf der Schneiderbüste und rief sofort: "Oh, das sieht ja aus wie aus unserer kleinen Farm!" Da hatte ich es also, und das Kleid hat seinen Namen weg!

I used a pattern which I already had made a dress from about a year ago, it is Burdastyle magazine 1/2010, no. 109, with modifications. I'm not a big fan of the first dress, I think I used a wrong fabric for it. It is in a very dark blue and also a bit heavy, so the dress looks very conservative.  Oh well, not every self-made dress can be a favorite, I suppose.
Das Schnittmuster hatte ich bereits: ich habe vor etwa einem Jahr schon mal ein Blusenkleid genäht, nach dem Schnitt 109 aus der Burdastyle 1/2010, mit kleinen Änderungen. Mit diesem ersten Kleid bin ich nicht allzu glücklich, ich denke der Stoff ist dafür etwas zu dunkel und wohl auch zu schwer, so dass das Kleid sehr ernsthaft und etwas bieder aussieht. Nun ja, es kann wohl nicht aus jedem selbstgenähten Stück ein Lieblingskleid werden. 


As I already knew the pattern, the construction of the prairie dress went along very quick and easy - until I made a big, big, silly mistake. 
I've got narrow shoulders, but don't make the alteration for this fitting issue on the paper pattern. Instead, I finished the dress without the sleeves, then I put it on and marked the seam lines where the sleeves go in directly on the the dress on my body. Then, I wanted to cut away the excess seam allowances, but this time, on the right front piece, I cut directly on the marked seam line, from the shoulders down over the whole front, until I recognized my mistake. What to do? I didn't have enough fabric, nor the patience, to start with a front piece all over again.
Das Zusammennähen ging einfach und schnell - bis ich eine Riesendummheit gemacht habe. 
Für meine schmalen Schultern muss ich die Schnitte immer abändern. Diese Änderung mache ich aber nicht am Papierschnitt, sondern ich nähe das Kleid normalerweise fast fertig und probiere es vor dem Einsetzen der Ärmel an. Dann markiere ich die Nahtlinie, an der die Ärmel eingepasst werden müssen, direkt auf dem Kleid an mir selbst. Das habe ich auch dieses Mal so gemacht, aber als ich dann am Vorderteil die überschüssige Nahtzugabe abschneiden wollte, habe ich aus Versehen statt dessen an der markierten Nahtlinie entlang geschnitten. Ich hatte schon die Nahtzugabe fast am ganzen rechten Vorderteil abgeschnitten, bis ich den Irrtum bemerkt habe. Dann aber war der Ärger gross! Ich hatte weder genug Stoff, noch die Geduld, noch einmal das rechte Vorderteil neu zuzuschneiden und einzunähen. 

So, at first, I stitched with a narrow zigzag over the wrong cut to have the seam allowances back to the front piece, to be able to easier handle it. The I set the sleeve in even a bit more located to the middle front, so that the stitching line was just about 2 millimeters away from the mistaken fabric edge.
Darum habe ich als erstes mit einem schmalen Zickzack-Stich die abgeschnittene Nahtzugabe notdürftig wieder reponiert, und den Ärmel eingesetzt, und zwar etwas weiter in das Vorderteil hinein als eigentlich geplant war. Die neue Nahtlinie ist jetzt ungefähr 2mm vom irrtümlichen Einschnitt entfernt. 


Then, after the sleeve was set in, I covered the cutter line again with a zigzag stitch, to fix it also with the seam allowance of the sleeve.
Nachdem der Ärmel eingesetzt war, bin ich nochmal mit einem Mehrfachzickzack-Stich über den Einschnitt drübergegangen, zusammengefasst mit der Ärmel-Nahtzugabe. 


That's it. So far, nobody has noticed that the right sleeves sits more to the front than the left one, and it still is comfortable for me, too. I just hope it will hold!
Bis jetzt hat - trotz des karierten Musters - keiner gemerkt, dass der rechte Ärmel vorne weiter zur Mitte sitzt als der linke. Und er ist trotz allem noch bequem. Ich hoffe nur, dass das Ganze hält!

For the buttons, I found the perfect ones - until I came home and noticed that they are actually made of plastic, instead of metal as I had thought. When I noticed that, I was a bit annoyed, but then again, if I was being fooled thinking they were made of metal, everybody else will think that, too!
Ich hatte die perfekten Knöpfe gefunden - zu hause habe ich dann gemerkt, dass die Knöpfe nicht wie angenommen aus Metall sind, sondern aus Plastik. Wie ärgerlich! Dann habe ich mir aber gedacht, dass wenn schon ich das nicht gemerkt habe, dass die Knöpfe nicht aus Metall sind, dann fällt es auch niemandem anders auf. 


Despite evoking unintended associations with an old tv-series, it still is a very comfortable dress, which I like to wear. I'm even thinking about making another one next year, maybe this time with narrow sleeves, and hopefully without cutting the wrong markings.
Trotz der ungewollten Assoziation mit einer alten Fernsehserie mag ich das Kleid sehr gerne. Es ist wirklich sehr bequem zu tragen und warm genug. Ich überlege sogar, irgendwann noch eines zu machen. Allerdings werde ich dann wohl schmalere Ärmel einsetzen. Und aufpassen, wo ich einschneide. 


October 24, 2012

(No) Fun with Stripes

I wanted to get some practice with my overlocker/cover machine, which I had intentionally bought to sew knit fabrics with. So I bought some jersey fabrics and made some t-shirts, in some sort of "mass production". I used pattern no. 112 from burdastyle magazine 2/2010.

I started with a t-shirt with stripes...


did you see the iron-on shark on it? The blurry blue color reminds me of water, and I had this iron-on motif lying around, so I applied it to the t-shirt, just for fun.

There was some fabric left, quite enough to make a sweater for little T., the baby son of a friend of mine.


Then I made another striped t-shirt, which turned out to be better than the first one (unfortunately, it came out a little bit too short, but that's not a problem, I just have to make a skirt to go with it).


Then I made a t-shirt without stripes...


(I'm not too sure about that fabric pattern and colors, but at least it is comfortable to wear at home.)

... and one more sweater for little T. (I couldn't resist buying this cute fabric with those little owls).


The next one is one of my favorites!


And one more with stripes... at this time I was already a bit bored by the pattern, and so I didn't care anymore about matching the stripes.


The last one with stripes, at least it isn't blue like all the others!


It's pretty cool to wear self-made t-shirts with stripes. But that's it. I was pulling my hair out when I did the neckline bindings. I used the cover mode of my overlocker with a chain stitch.

First, the machine used to skip stitches every few inches. Which is really bad because the chains on the back side of the seam are not properly linked, to the seam will probably open one day.


I could solve this problem by using a brand new, special cover stitch needle.
But still, I find that binding necklines is not easy at all. Sometimes the whole neckline stretched out, but there are also shirts where the neckline is slightly gathered under the binding. Even when I just added a fabric stripe to turn it in. And the overlocker seems to have problems crossing thicker parts with more than two fabric layers.


For the orange shirt, I wanted to apply some real cuff fabric, and I did, but it stood from the neckline in a really weird way, so I turned the whole thing to the inside of the shirt and now it looks better. Still, this isn't what the plan was!


The blue-pink shirt came out the best concerning the neckline.


But still, the seam is wonky and not really nice. And the stripes are not matching at all.

This was another problem I struggled with: I didn't get the stripes to match perfectly. They were all nicely pinned in place, but under the foot of the overlocker, the lower fabric layer somehow goes faster, and everything is shifting. It was the same with the differential feed turned off. And it wasn't much better when I hand basted the seams first.

Oh well, at least it's only t-shirts! I guess it will go better with more practice. But I think that for the next project, I will return to sewing nice and easy-to-handle wool fabrics!

September 13, 2012

One More Summer Dress Finished

I finally finished my last summer dress for this year right in time to wear it for the last warm day.


It was too cold to wear it without a cardigan, though.


I have to say that I'm not completely happy with the dress. I'm not sure if a dress with small straps and no sleeves is a flattering style on me, and I feel kind of naked in it. I do love the fabric, but it feels a bit too bright and colorful (a friend told me that this is just because autumn arrives, and that I will love the colorful dress next spring). But the worst is that it doesn't fit right in the bodice, and I didn't know how to solve this fitting problem.


See how the bodice wrinkles at the side seam? It's not so much on the left side seam, but for some reason, at the right side it's really awful. I spent a whole day ripping, pinning, basting and ripping again, with no success. The wrinkles stayed as they are, they didn't even change a bit. In the end, frustrating as it was, I decided to just leave the wrinkles and finish the dress nonetheless.

I set in a handpicked zipper at the center back,


and I lined the bodice with cotton voile. The bodice is also underlined with silk organza.


For the shoulder straps, I used the same bias taping as for the "piping", but I inserted silk organza straps to keep them from stretching out.

Well, I will see how I like the dress next spring, for the moment it is too cold to wear it, anyway!


And now I'm off to start, a bit late, with my vestido rojo. I already traced the pattern!

August 7, 2012

Evil Jersey Edge Binding

I'm back from vacation! Two weeks being outside in nature every day, fishing, hiking, and no internet access... it was very relaxing, but I'm glad to be connected to the sewing world again!

The last project I finished before going on vacation was a small one: a present for a friend who gave birth to a little boy about four weeks ago.


It is a sleeping bag for babies, made from a (boy appropriate) printed cotton and cotton jersey as lining.
It has an in-seam side zipper and snaps at the shoulders. The pattern is from Burda magazine 3/2011.


I allowed myself a little joke and added my own "fashion label" at the bottom, the sort I only used for my husbands shorts so far.


I also cut out some single birds of the scraps and padded them.


They were made into a mobile later, hung up on a music stand! (Doesn't that look like a happy little baby?)


So, it seems to be an easy little project, right?
But. I had to face a sewing problem that is a really awful one for me, a sewing technique that I never got right in the past and with this project, it wasn't better.

I'm talking about binding the edges of the neck opening with jersey.
Like always, and according to the instructions, I first attached the jersey tape to the edge, then fold in the free edge of the tape and turned the binding to the inside of the sleeping bag.
It still looked quite nice when pinned:


 Then I did the topstitching and as always the tragedy started. The jersey stretched out whereas the neckline didn't, the foot of my sewing machine pushed the jersey in waves that became bigger and bigger... I ended up with sewing the whole neckline without pulling the pins out, sewing over all of them (yes I know I shouldn't do that).

So that is how it turned out:


Not very nice, but acceptable for me. (My demandings for this are quite low, since I had only bad results with this in the past).

But the inside part looks really awful!


The seams are wonky and you can see very clearly where the pins have been.
Luckily, my friend who got this for her baby didn't care and likes the sleeping bag nevertheless (this is how you get to know your real friends!). But I'm not satisfied with getting results like that.
I have also tried using my cover locker for this, but that was even worse (the cover locker doesn't go around curves easily).

So, does anyone of you know how to do better than me? Then, please, tell me, I would be very happy about any hints!


May 28, 2012

Bag Sewing Disaster

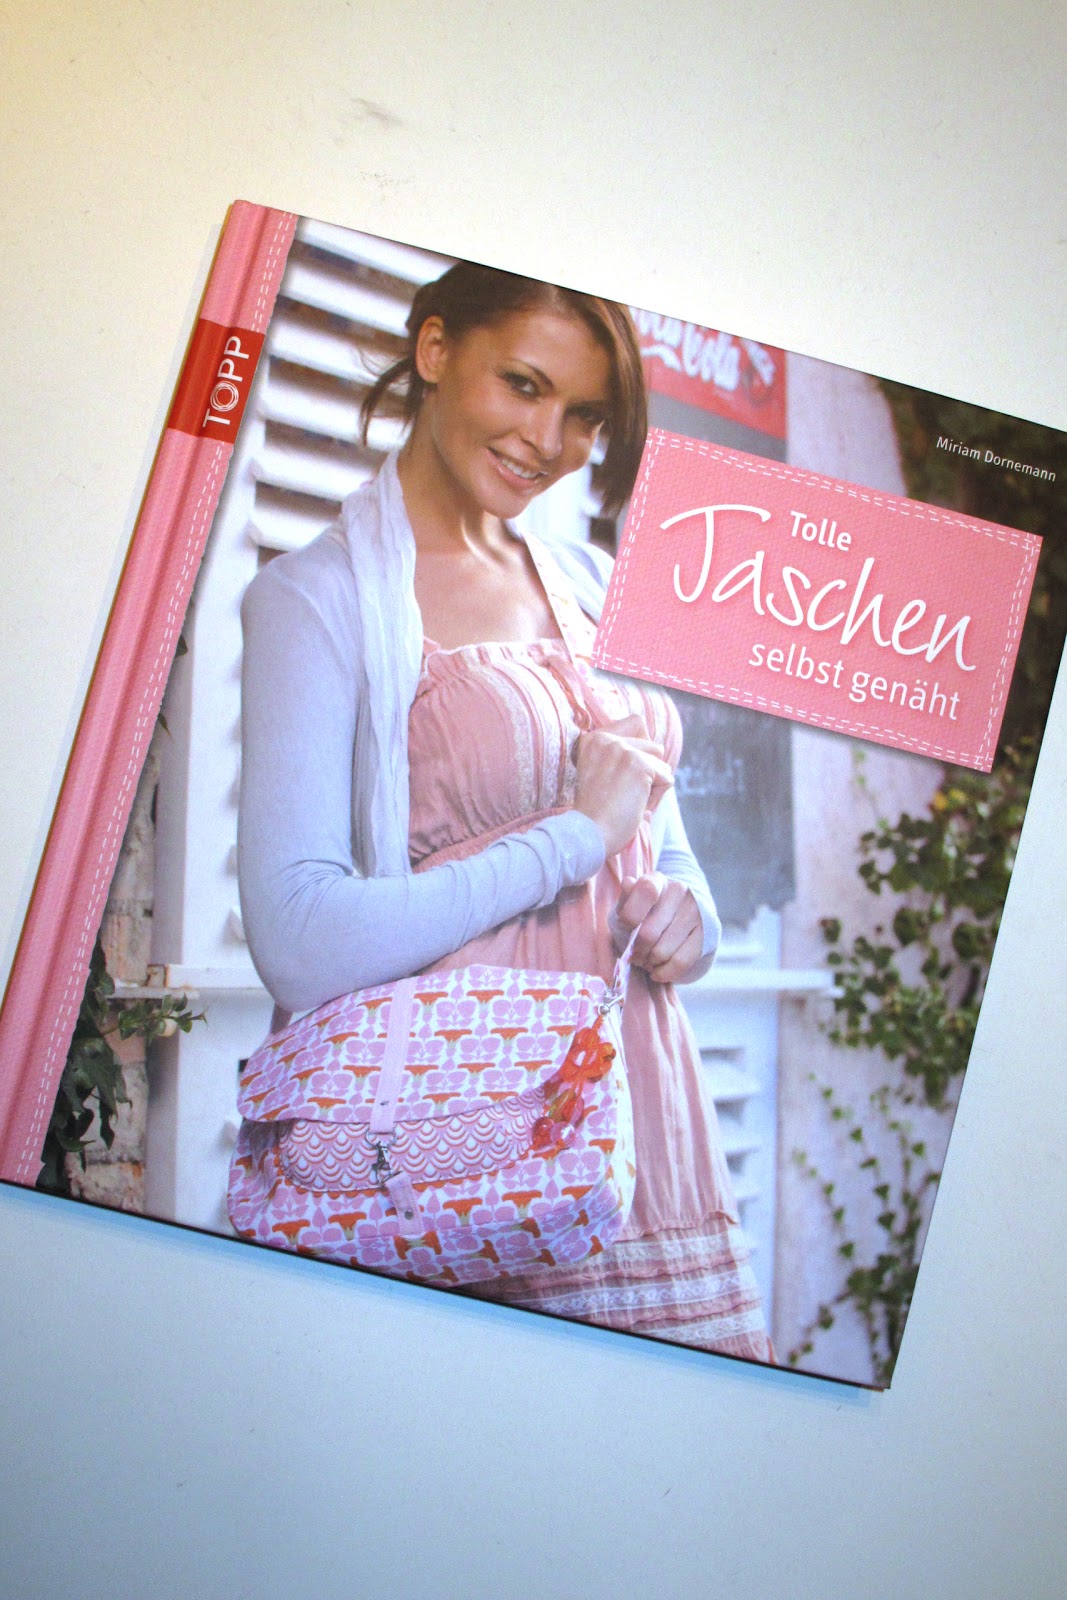
I have a friend who likes sewing, just like me. Unlike me, she doesn't sew garments, instead she makes bags and cushions. I have to say that I never felt very motivated to sew any bags or decorating stuff. I wanted to make a bag about three months ago, and I cut out the fabric and then forgot about it. It is still lying around somewhere, unsewn. But seeing all the nice things my friend made, and with a beautiful fabric I found this week in my Bernina shop, I wanted to try again to make a bag. So I prepared for it, took my new fabric and bought the recommended bag sewing book.


I knew it would be a lot of work, but I also thought it would be easy. Stupid me. It wasn't.
Obviously there is a difference between sewing garments and sewing bags that I cannot explain. I just had difficulties in understanding the instructions, and I also found it technically not that easy to sew those seams. I felt like when I started sewing garments about six years ago, where I struggled to get those pieces together without really knowing what I was doing.

This is the result of an afternoon of painstaking work (please don't look at it too closely, it looks a lot better from far!):


The bag is huge! I didn't expect it to be that big when I saw the photo in the book, and I still wasn't suspicious when I copied the pattern, but it is about twice the size I expected (and wanted) it to be!

I lined the whole bag in pink cotton poplin, and added an inner pocket to it to use up the fabric scraps. Nice idea, but for some unknown reason I put it much too deep into the bag, so the inner pocket now ends where the bottom of the bag is. Although I had to put it in two times, because the first time I forgot to close the bottom of the pocket, so that everything would have fallen out.


I gave up the moment I had sewn the straps together and wanted to turn them over. After I had finally turned over the first centimeters, it was obvious that I didn't want to spend the whole night and tomorrow just for turning over the shoulder straps.


So I cut them again but wider and shorter, which went a lot better.
At the end, I didn't get the bag I had in my mind, but at least a complete bag. Maybe I can take it to the lake with some lemonade and a good book in it in summer!
And now I'm off to sew only garments again, phew!


Related Posts Plugin for WordPress, Blogger...