Showing posts with label bindings. Show all posts

February 18, 2013

Cozy Wool Knit Dress

There is nothing better to wear in winter than a cozy, warm wool knit dress with warm woolen tights. Better than any jeans could be!
As I need more practice in sewing knits anyway, and we have a really nice winter with snow here in Switzerland, I decided that I could use one more wool knit dress.

Im Winter gibt es keine bessere Kleidung als ein gemütliches, warmes Kleid aus Wolljersey und warme Strumpfhosen aus Wolle. Das hält wärmer und ist bequemer als jede Jeans!
Ich muss ja sowieso das Nähen von Strickstoffen mit der Overlock noch üben, und wir haben hier in der Schweiz zur Zeit einen wirklich schönen Winter mit einigermassen viel Schnee, also ist ein selbstgenähtes Wollstrickkleid perfekt für beide Zwecke. 
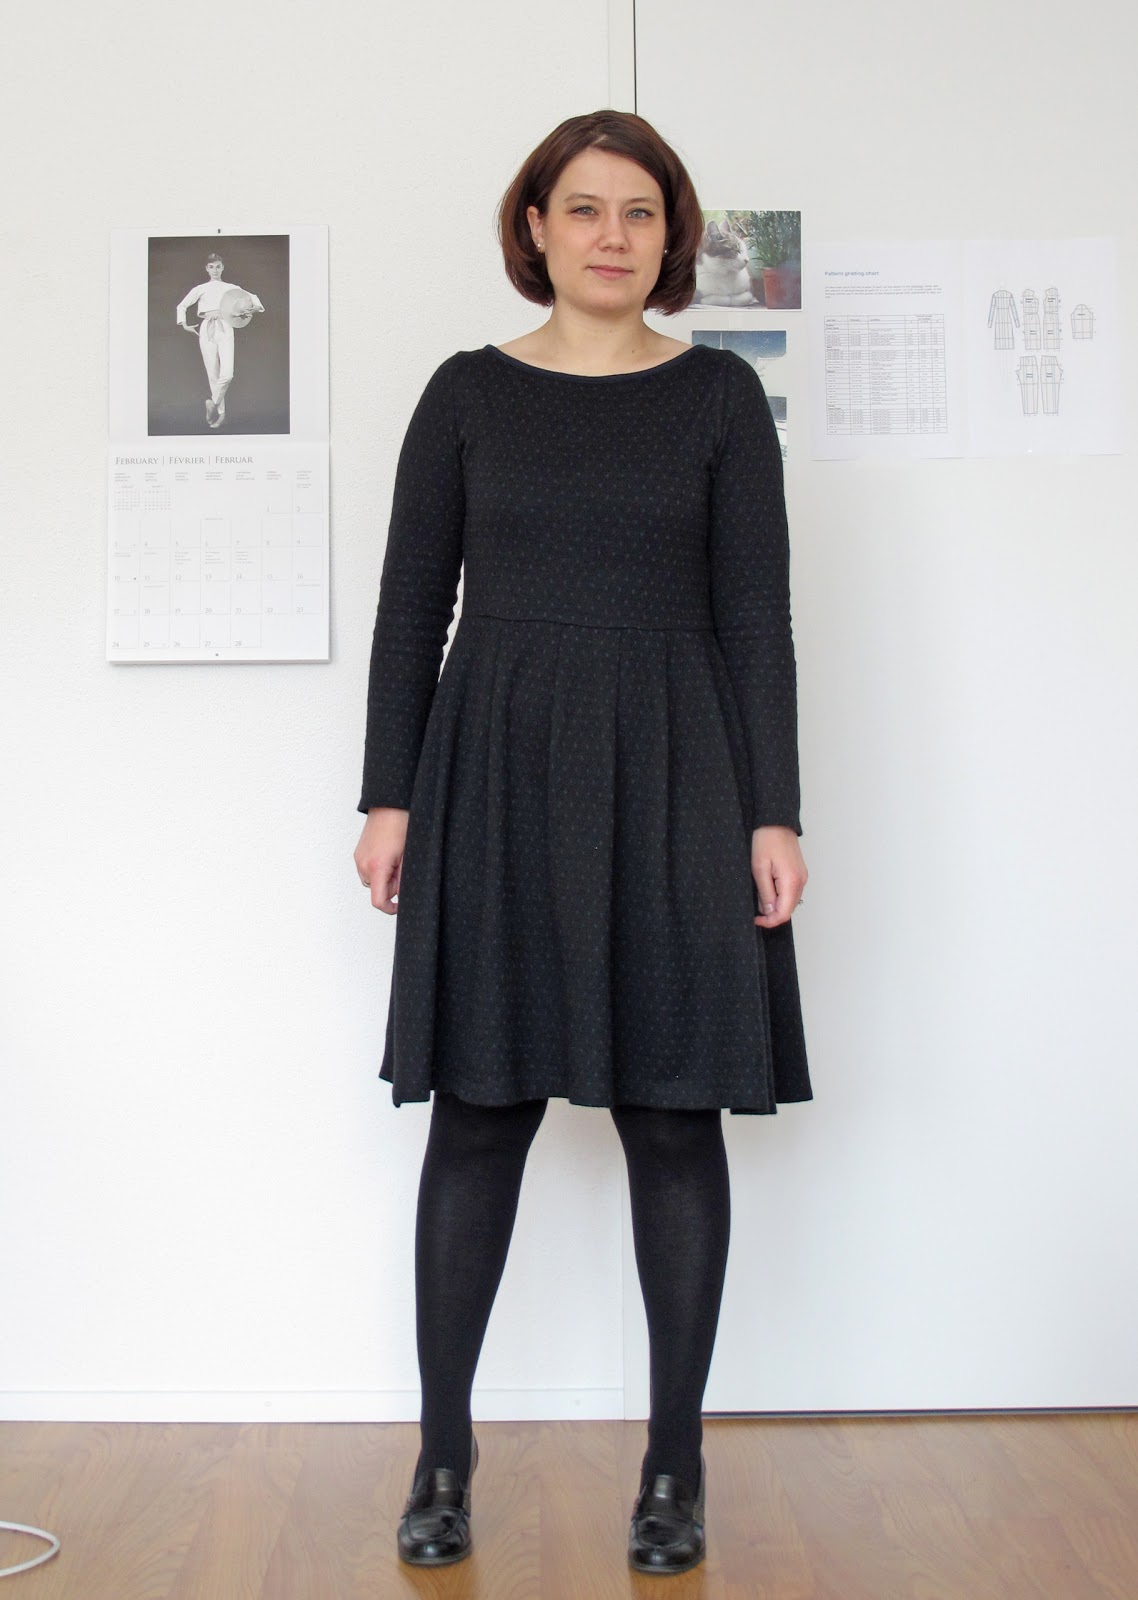


And here it is. I still have to get more practice in sewing knit fabrics, but the dress is warm, cozy, and it fits. The fabric is a very nice wool knit, black with small blue dots on the right side and blue on the wrong side.
I used Burdastyle's pattern no. 108 from the 2/2009 issue for the top part, cut at the waist and then shortened again by 2 cm, as the weight of the stretchy fabric pulled the waistline seam down. The pattern for the skirt is made by me, mainly it is two rectangles with pleats and rounded at the side seams.

Hier ist es: immer noch nicht perfekt genäht, aber warm, gemütlich, und es passt. Für das Kleid habe ich einen wunderbaren Wolljersey gefunden, schwarz mit blauen Pünktchen auf der rechten, und uni-blau auf der linken Seite. 
Für das Oberteil habe ich den Schnitt Nummer 108 aus der Burdastyle 2/2009 genommen und ihn bis auf Höhe der Taille gekürzt. Später habe ich ihn um weiter 2 cm gekürzt, da das Eigengewicht vom Rockteil das Oberteil gedehnt und nach unten gezogen hat. 

I attached some unstretched clear elastic to the waistline seam to prevent it from stretching out with time.

In die Taillennaht habe ich klares Gummiband ungedehnt mitgefasst, damit die Taille mit der Zeit nicht ausleiert. 


The neckline binding, for which I used the blue, wrong side of the fabric, worked better than usual. Maybe it was just luck, but this time, I only folded the binding on the outer side and not on the inner side, and it seemed to work better with my cover lock machine. (Although I think that it looks less clean inside the garment.)

Das Einfassen des Halsausschnitts hat diesmal besser geklappt als sonst. Ich habe es nur auf der Aussenseite eingeschlagen und an der Innenseite nicht, aber ich weiss noch nicht, ob es daran gelegen hat. Jedenfalls sieht das Ganze diesmal sauberer aus, zumindest von aussen. 


Another problem was with the "straight grain". I made the dress so that the straight grain was correct, but the the pattern of the small blue dots then doesn't run horizontally but is slanting down from left to right. Almost all of the patterned knit fabric I've used so far seem to have this problem!

Ein bisschen Kopfzerbrechen hat mir der "Fadenlauf" bereitet. Ich habe beim Zuschneiden darauf geachtet, dass der stimmt, aber dann laufen die Pünktchenreihen nicht mehr schön horizontal sondern schräg. Das Problem hatte ich bisher bei fast allen gemusterten Jerseys!

Anyway, there was plenty of fabric left, but not enough to make a top with it, so I used the leftover fabric to make a scarf. I stitched two long rectangles together with my sewing machine, turned the side edges over and cut near the stitching line, and that's it. I hope that winter will not be over too soon!

Von dem Stoff ist einiges übrig geblieben. Leider war es nicht genug, um daraus noch ein Oberteil zu nähen, aber für einen Schal hat es gereicht. Ich habe einfach zwei lange Rechtecke mit der Nähmaschine zusammengenäht, die Seitenkanten einmal umgeschlagen und festgenäht, und dann den überstehenden Stoff ganz dicht an der Nahtlinie abgeschnitten. Jetzt habe ich auch noch einen passenden Schal! Hoffentlich bleibt der Winter noch ein bisschen!


October 24, 2012

(No) Fun with Stripes

I wanted to get some practice with my overlocker/cover machine, which I had intentionally bought to sew knit fabrics with. So I bought some jersey fabrics and made some t-shirts, in some sort of "mass production". I used pattern no. 112 from burdastyle magazine 2/2010.

I started with a t-shirt with stripes...


did you see the iron-on shark on it? The blurry blue color reminds me of water, and I had this iron-on motif lying around, so I applied it to the t-shirt, just for fun.

There was some fabric left, quite enough to make a sweater for little T., the baby son of a friend of mine.


Then I made another striped t-shirt, which turned out to be better than the first one (unfortunately, it came out a little bit too short, but that's not a problem, I just have to make a skirt to go with it).


Then I made a t-shirt without stripes...


(I'm not too sure about that fabric pattern and colors, but at least it is comfortable to wear at home.)

... and one more sweater for little T. (I couldn't resist buying this cute fabric with those little owls).


The next one is one of my favorites!


And one more with stripes... at this time I was already a bit bored by the pattern, and so I didn't care anymore about matching the stripes.


The last one with stripes, at least it isn't blue like all the others!


It's pretty cool to wear self-made t-shirts with stripes. But that's it. I was pulling my hair out when I did the neckline bindings. I used the cover mode of my overlocker with a chain stitch.

First, the machine used to skip stitches every few inches. Which is really bad because the chains on the back side of the seam are not properly linked, to the seam will probably open one day.


I could solve this problem by using a brand new, special cover stitch needle.
But still, I find that binding necklines is not easy at all. Sometimes the whole neckline stretched out, but there are also shirts where the neckline is slightly gathered under the binding. Even when I just added a fabric stripe to turn it in. And the overlocker seems to have problems crossing thicker parts with more than two fabric layers.


For the orange shirt, I wanted to apply some real cuff fabric, and I did, but it stood from the neckline in a really weird way, so I turned the whole thing to the inside of the shirt and now it looks better. Still, this isn't what the plan was!


The blue-pink shirt came out the best concerning the neckline.


But still, the seam is wonky and not really nice. And the stripes are not matching at all.

This was another problem I struggled with: I didn't get the stripes to match perfectly. They were all nicely pinned in place, but under the foot of the overlocker, the lower fabric layer somehow goes faster, and everything is shifting. It was the same with the differential feed turned off. And it wasn't much better when I hand basted the seams first.

Oh well, at least it's only t-shirts! I guess it will go better with more practice. But I think that for the next project, I will return to sewing nice and easy-to-handle wool fabrics!

August 7, 2012

Evil Jersey Edge Binding

I'm back from vacation! Two weeks being outside in nature every day, fishing, hiking, and no internet access... it was very relaxing, but I'm glad to be connected to the sewing world again!

The last project I finished before going on vacation was a small one: a present for a friend who gave birth to a little boy about four weeks ago.


It is a sleeping bag for babies, made from a (boy appropriate) printed cotton and cotton jersey as lining.
It has an in-seam side zipper and snaps at the shoulders. The pattern is from Burda magazine 3/2011.


I allowed myself a little joke and added my own "fashion label" at the bottom, the sort I only used for my husbands shorts so far.


I also cut out some single birds of the scraps and padded them.


They were made into a mobile later, hung up on a music stand! (Doesn't that look like a happy little baby?)


So, it seems to be an easy little project, right?
But. I had to face a sewing problem that is a really awful one for me, a sewing technique that I never got right in the past and with this project, it wasn't better.

I'm talking about binding the edges of the neck opening with jersey.
Like always, and according to the instructions, I first attached the jersey tape to the edge, then fold in the free edge of the tape and turned the binding to the inside of the sleeping bag.
It still looked quite nice when pinned:


 Then I did the topstitching and as always the tragedy started. The jersey stretched out whereas the neckline didn't, the foot of my sewing machine pushed the jersey in waves that became bigger and bigger... I ended up with sewing the whole neckline without pulling the pins out, sewing over all of them (yes I know I shouldn't do that).

So that is how it turned out:


Not very nice, but acceptable for me. (My demandings for this are quite low, since I had only bad results with this in the past).

But the inside part looks really awful!


The seams are wonky and you can see very clearly where the pins have been.
Luckily, my friend who got this for her baby didn't care and likes the sleeping bag nevertheless (this is how you get to know your real friends!). But I'm not satisfied with getting results like that.
I have also tried using my cover locker for this, but that was even worse (the cover locker doesn't go around curves easily).

So, does anyone of you know how to do better than me? Then, please, tell me, I would be very happy about any hints!


Related Posts Plugin for WordPress, Blogger...