Showing posts with label my sewing room. Show all posts

August 21, 2012

Dress Form Individualized

I feel as if I had been a lazy seamstress during the last weeks, but in fact I haven't been that lazy. I  made two skirts (which I hope to show you later), and I finally tackled a project I had planned since a while: I made my own dress form, modifying my standard dress form.


This was my dress form before:


It's adjustable, which means that you can regulate your bust, waist and hip circumference with little wheels. The problem is, while my dress form and me have the same measurements, we did not have the same shape!
My back is more rounded, while the dress form has a very erect back, and I also have forward shoulder joints, and since I am a very short person, my waist falls about where you can see the vertical line on the photo (here, you can adjust the dress form to make the torso longer. Unfortunately, making it shorter is not possible). Because of all that, the dress form wasn't really a help in fitting. Some garments even didn't fit over it, there was a hard pulling at the back and around the shoulders! So I decided that I need a dress form that reflects more my very own shape.
I could have made a duct tape dummy, but I've read that you can't put needles into it, or that they would come out sticky, and I also don't like a lot what they look like. And I've also heard before that you can make one with fabric, too. Although I couldn't find any detailed instructions for that, I decided to give it a go, as an experiment, sort of.

So this is a description of how I did it, and although I don't know if I did it the "right" way, maybe someone will get some help out of it to avoid some of the mistakes I made!

First, I used my basic bodice block to make a shell, to be opened at the center front. I marked vertical lines over the bust point at the front pieces and down from the shoulder darts at the back piece. I stitched the side seams with the sewing machine.


I put the shell on and closed it with pins at the center front, then pinned along the vertical markings until the shell fit snugly around my front body part. (I know these are not the most attractive photos of me, but oh well...) I should have pinned further down, though. I didn't and that makes my dress form now look quite bold and lumpish at the bottom (although I think that it doesn't influence fit, as this is not a "fit sensitive area" in the clothes I use to sew).


I had my husband to do the same at the back, and although he doesn't know anything about sewing and fitting, he did a great job with this (thank you, dear!). I think it helped that he had those vertical lines as a guide.


He also pinned the excess fabric away at the waist (my swayback) - and again, I think it helped that I had also marked the waistline on the shell before.

I also let him mark the neckline and the armholes on the fabric with a pen, and before putting the whole thing of, I marked the new center front with dots, on both sides (left and right), to be able to close it the same way again later.

Then I put the whole thing off, marked the placements of the pins and connected the lines to get some sort of "darts", which I stitched with my sewing machine.

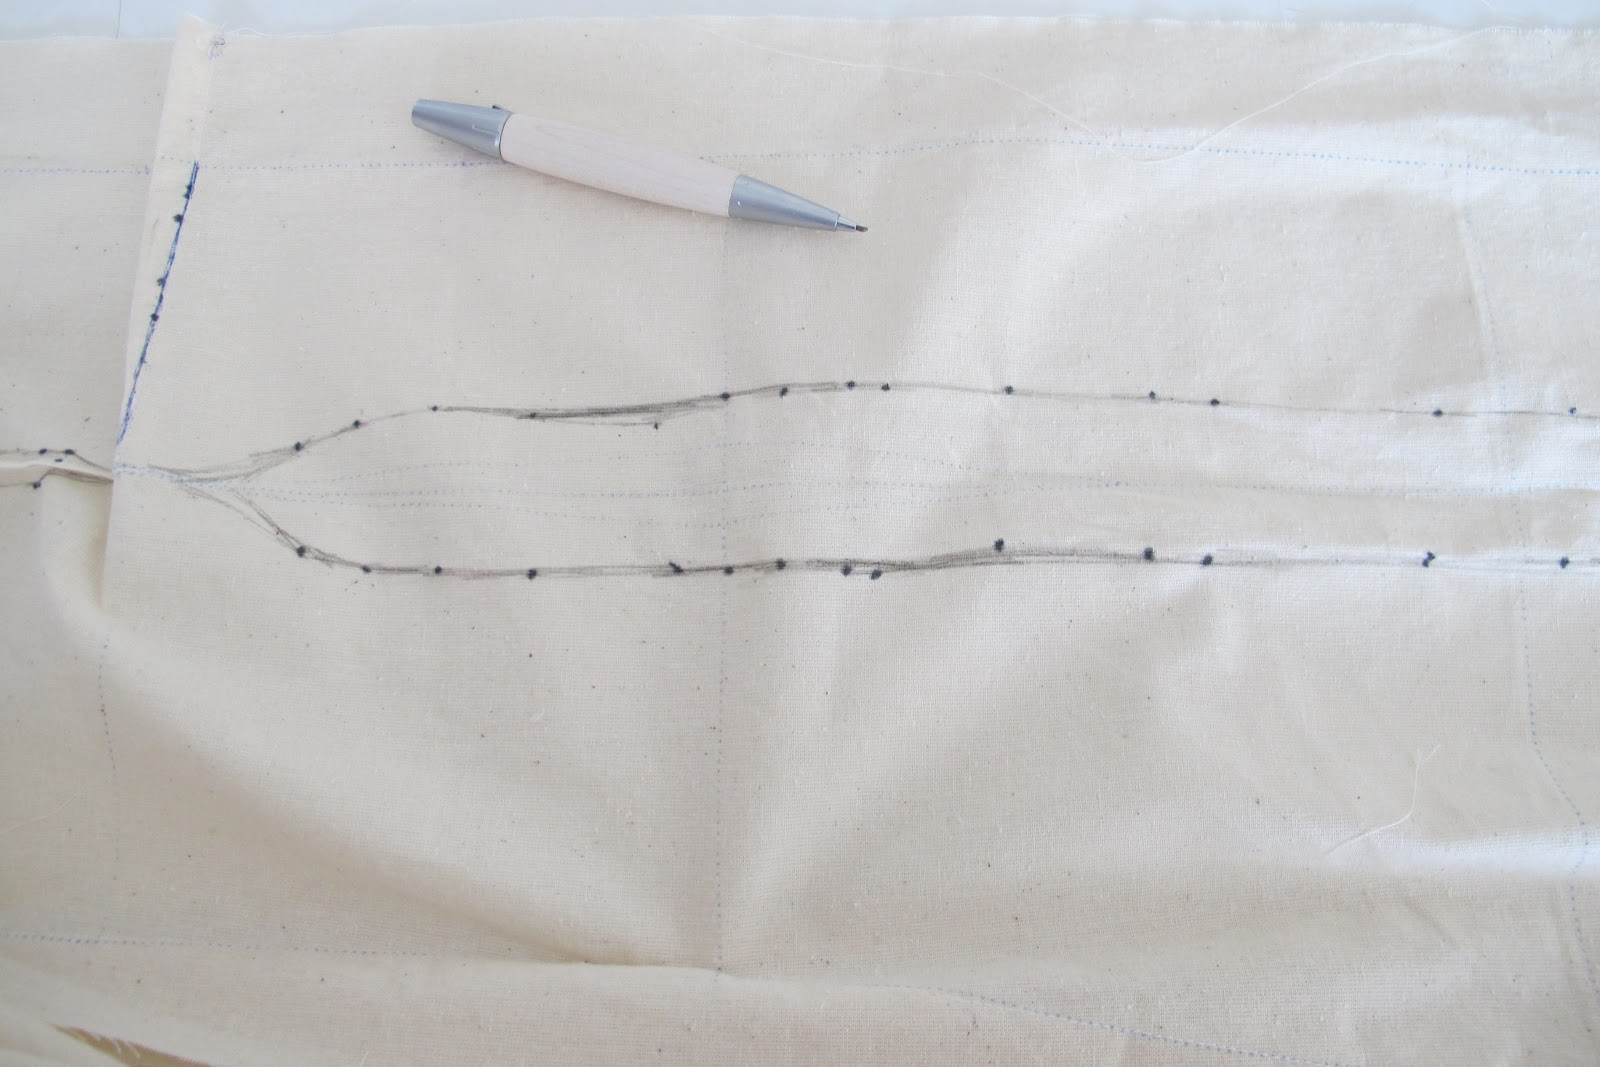

I've always thought before that stuffing the whole thing would be the fun part of the whole process - I was wrong. That was the most awful part, and I almost broke off the whole experiment.

Here is what I did: First I made my dress form as small as possible with those adjustment wheels, to make sure that my new shell would fit over it. Then I put the shell on, closed it at the front with pins and started to stitch the front closed, beginning from the bottom. I also added a provisional drawstring to close the shell at the bottom.


I was ready to stuff it. For the filling, I used rubber foam flakes (is this the right word? I had to look it up in my dictionary and there are so many translations...). They were cheap and I was hoping that I could stuff them really tightly.


It didn't work out with stuffing tightly and firmly, since the shell fabric stretched out. It looked very nice, but when I checked the measurements with my new tape measure, it turned out that the new dress form had several centimeters of circumference more than I have. Removing a part of the rubber foam helped, though.

I stuffed the shell from the bottom to the top, inserting the flakes through the front opening and also through the armholes, while constantly checking the measurements and stitching the front opening closed, bit by bit. I used the handle of a wooden kitchen spoon to stuff the center back.


In the end, I stitched the rest of the center front seam, and closed the bottom drawstring definitely. I folded the neckline seam allowances towards the inside and closed the armholes with two patches of fabric.


That was it! This is what it looks like now:


I think it is still not perfect, but my self-made, fitted dresses now fit a lot better over my dress form, and I can put pins into it. I will see how it works with the next projects.

Things I would do better if I had to go through the same process again:

  • I would use a sturdier, firmly woven fabric for the shell. Maybe then I could stuff it more tightly without stretching the fabric out, and the yellow filling material wouldn't show through. 
  • I would look for a better filling material, that would be easier to spread evenly under the fabric, without scrunching up in bulky balls. Although I still don't know what sort of material this could be. 
  • I would use a smaller dress form as a basic. It was quite difficult on some points to get the shell fabric over the dress form, and the new dress form does not mirror my swayback. There simply wasn't enough empty space between the dress form and shell to get the shape very exactly. 
  • I would use a pencil instead of a pen to make all the markings. I also wanted to have a beautiful dress form which is nice to look at, since it is a constant "decoration element" in my sewing cave. But the pen markings are there, and that spoils the whole look a bit!

Modifying my dress form wasn't as much fun as sewing a garment, but in the end I'm quite glad I did it. And if you stumbled upon this blog post because you are thinking about making or modifying your own dress form, I hope you got some helpful information from it. Feel free to leave me any questions if you have them!

August 9, 2012

Tape Measure Madness

Do you buy a new tape measure from time to time? I was told to do so, because tape measures appear to stretch with time and use. Of course it's very important in sewing to take proper measurements with a reliable tape measure, and my actual tape measure was already quite old, so I went to my local Bernina store to buy a new one. I didn't know before that there exist several qualities of tape measures, but when the saleswoman asked me if I wanted to have "a normal one, a good one or a very good one" I certainly asked her for the best!
The one she gave me then was an inconspicuous yellow one. But she told me that it will not stretch out at all and that it was calibrated (what ever that means for a tape measure).

Then I was curious about if my old tape measure had stretched out, and I decided to check that. (A little bit afraid that my hip circumference might be even more than I thought so far, with my stretched out tape measure.)

So, at home, I laid my two tape measures next to each other on the dining table.


The yellow one on the right side is the new, calibrated, non-stretchy one, and the one on the left side with alternating red-white-green colors is my old one.

I put the 1cm marks as the "starting points" next to each other.


Now see what it looked like at the 50cm marks (yellow: new tape measure; red-white: old tape measure):


And at the 100cm marks:


This is what the ends of the tapes looked like:


What happened? Did my old tape measure shrink instead of stretching out? Or can the companies who produce those tapes just print an estimated measuring scale onto their products? (That would make some sense to the calibration of certain measurement tapes, though.) I have to say that I'm quite surprised by this result. (On second thought, I'm also glad to know that my hip circumference is in fact smaller than I thought so far. Of course that will not make a whole size or something, neither change anything in my body proportions.)

Did you have a similar experience already? I want to encourage everybody who has several tape measures to compare them!


Other than that, I got another award!


I got it from Sonia of La pequna aprendiz, thank you Sonia! And I hand it on to KC of The Sewcratic Method, who always makes me laugh when I'm reading her blog posts! (I am quite glad that I can give her an award at all, as she seems to have all of them already - well deserved, of course!)


June 27, 2012

New Sewing Toys

After one year of thinking about it, I finally did it: I bought a serger! I am not sure if it is called overlocker or serger, my dictionary says that one expression is American and the other one British English...


In the shop where I bought it they told me that it is really called a "cover locker", because it can not only make those overlock seams but also do cover stitches (those which are often used to hem t-shirts) and chain stitches. Anyway, I don't care so much what it is called like, I am happy to have it!
So, my dear sewing machine, and my dear new cover locker, please be nice to each other and work well together!


Now I have two sewing machines on my table, and I am glad that I still have enough space to do the rest of the work like pinning, hand sewing,...  For tracing patterns and cutting out fabrics I put both machines from the table onto the floor, though.
My first project I did with the new machine was two pair of pants, which I finished yesterday, I hope to show the to you later!

The second investment I made is a small book:


It is mainly a bunch of cards with Pantone color combinations, and a more or less pathetic name and description for each combination.


But why is it useful in sewing? Just imagine the following situation: I'm making a garment, like most of the time from a plain colored fabric, and I think it can use a little extra to spice it up, something like some piping, or buttons, or topstitching in a contrasting color. But which color should I choose? I'm not a creative person (I'm just copying what I like from others, more or less), and I don't have such a thing like a "natural feeling for colors". So, as I am unsure about my color choices, I tend to combine everything with rather neutral colors like black or white or taupe, which works well but is still a bit boring. But from now on, I can open my Pantone booklet, look for the color I'm using for my garment, and see what other colors will go with it harmonically! How good is that? I have to admit that this is only theory so far, I didn't get into described situation yet since I own this book. Apart from that, it is also nice to just leafing through the book and looking at all those nice color sheets!


April 22, 2012

So today I am starting my own sewing blog...


I am surprised myself because usually I don't like writing very much, especially in English, and I comment very rarely on other blogs and it takes me forever to post my finished projects on burdastyle.com  (in fact I have a lot of finished projects which I never posted just because I am too lazy). But then I signed up for Me-Made-May '12, and browsing through the list of participants I thought "Oh, everybody has their owns blogs, and I don't", and started thinking wether I should try my luck with an own blog. Probably there will be less text and more photos... I will see how it goes.


I named the blog after my sewing room, which is usually quite messed up, so my family calls it my "cave". Luckily, in contrary to an untidy Neandertaler's cave, I have a lot of sunlight in my room! You can get an impression on the (unfortunately blurry) photo below: I love that I have my computer and my sewing machine side to side, so I can just switch easily from sewing to reading sewing blogs and vice versa!

Me at my computer, with my sewing machine and a lot of sewing and non-sewing related stuff on the table

Related Posts Plugin for WordPress, Blogger...